
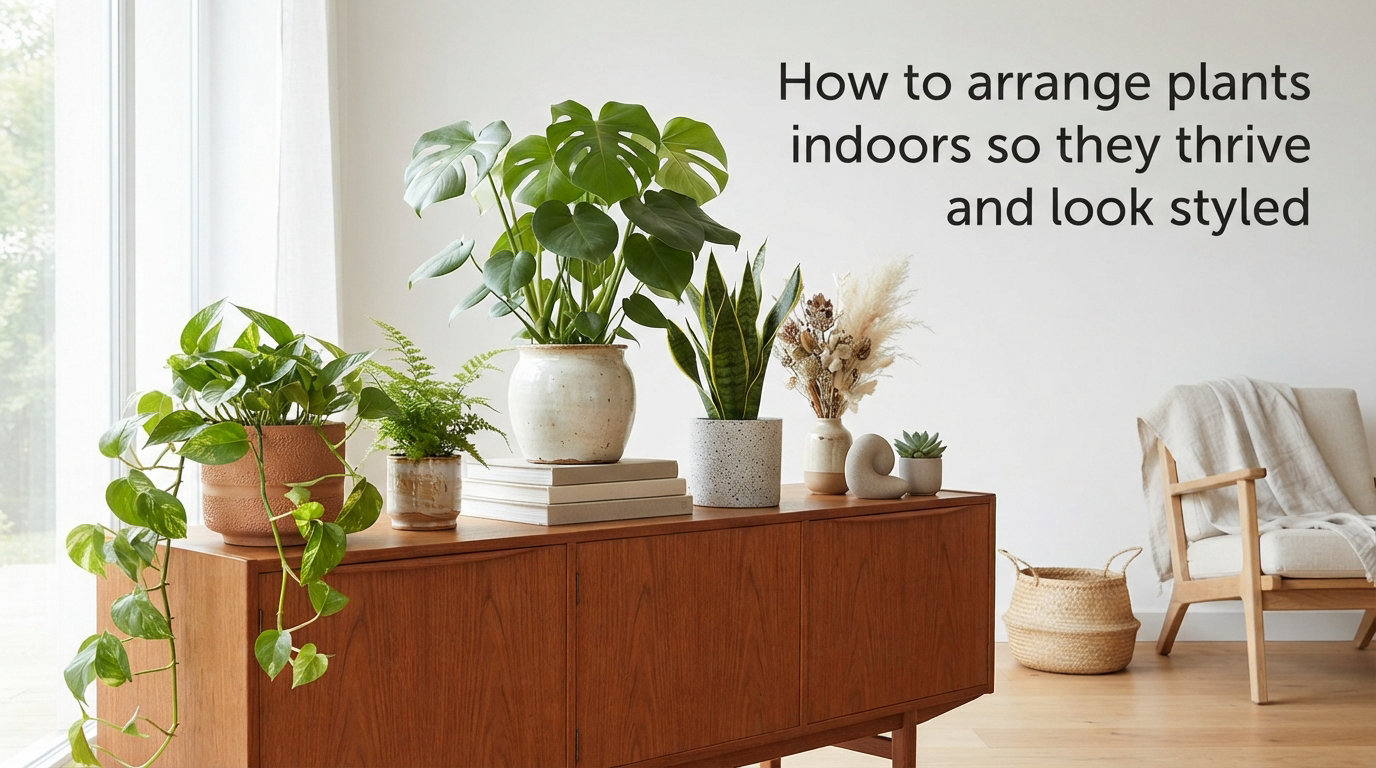
Two summers ago, I walked into a friend’s apartment and stopped in the doorway. Every plant was alive, every corner felt intentional, and the space looked like a magazine spread. When I asked her secret, she laughed and said, “I stopped decorating with plants and started arranging them.” That single sentence changed the way I approach indoor gardening, and it is the foundation of this guide.
If you have ever lost a plant that looked perfect on the shelf, or wondered why your carefully collected greenery still feels cluttered, the problem is almost always arrangement. Learning how to arrange plants indoors is the difference between a home that looks like a nursery and one that looks like it has been styled by a designer. In this 2026 guide, I will walk you through the exact framework I use with my own collection of 40+ houseplants, including the height layering method, grouping tricks, and light matching logic that separates struggling plants from thriving ones.
You will learn how to evaluate light zones, place plants at three height levels, group them in odd numbers, match planters to your interior style, and avoid the most common mistakes that kill styled arrangements. By the end, you will have a complete system for arranging plants indoors so they thrive and look styled, no matter your space or experience level.
Table of Contents
Start With Light: Match Plants to Your Room’s Conditions
Before you move a single pot, the very first step in learning how to arrange plants indoors is matching each plant to a light zone. Plants placed for looks alone are plants that die slowly under the wrong conditions. I learned this the hard way with a fiddle leaf fig that looked gorgeous in a dim hallway for exactly three months before dropping every leaf.
Identify your light zones
Walk through your home at different times of day and notice where direct sunlight hits the floor. South-facing windows give bright light for most of the day, east and west windows offer medium light, and north-facing windows or interior corners usually provide low light. A plant sitting two feet from a south window lives in a different world than the same plant ten feet away in a darker corner.
Match plants to light levels
Pair low light plants like pothos, snake plants, and ZZ plants with hallways or interior shelves. Place medium light plants like philodendrons, peace lilies, and fiddle leaf figs near east or west windows. Reserve bright light spots for succulents, cacti, and herbs. The kitchen windowsill is often the strongest light source in a home, which is why it makes a natural home for herbs.
Use grow lights when natural light falls short
If your favorite spot lacks natural light, a full-spectrum grow light can mimic the sun and keep plants thriving. I added a single grow bulb to a dark reading nook and now host a thriving pothos and a marble queen in what was once a dead zone. Grow lights are not a styling failure. They are a practical tool that lets you place plants where they look best.
The Three-Zone Height Layering Framework
Once you know where your light lives, the next step in how to arrange plants indoors is height layering. I use a three-zone framework that makes any collection look intentional, whether you have five plants or fifty. Each zone creates a different visual layer, and when you stack them together, the room feels grounded, balanced, and alive.
Zone 1: Floor plants anchor the room
Floor plants are the foundation of any styled arrangement. Large plants like fiddle leaf figs, bird of paradise, or floor-standing monsteras anchor corners and frame furniture. Place a tall plant in an empty corner to draw the eye up and fill negative space. I keep a statement rubber plant in the corner of my living room, and it does more for the whole arrangement than any tabletop piece.
Zone 2: Surface plants fill the middle layer
Surface plants live on tables, shelves, sideboards, and windowsills. This middle zone is where most of your styling happens. Group two or three medium plants on a console table, vary their heights with a small stand, and use trailing plants like pothos or string of pearls to spill over the edge. The middle layer is what makes a vignette look composed rather than collected.
Zone 3: Elevated plants add vertical interest
The elevated zone includes hanging planters, macrame hangers, and high shelves. This zone draws the eye upward and makes ceilings feel taller. A single pothos in a hanging basket above a window turns dead space into a focal point. When I added a hanging plant to my stairwell, the entire vertical run of the house came together.
Grouping Strategies That Make Plants Look Intentional
Two plants on a shelf looks like clutter. Three plants on a shelf looks styled. The difference is grouping, and learning how to group houseplants together is one of the fastest ways to upgrade your indoor plant styling.
Why odd numbers work
Odd-number groupings (3, 5, 7) feel more natural to the eye than even numbers. Designers use this trick because pairs create a formal symmetry that reads as rigid, while odd numbers create soft asymmetry that feels organic. I default to groups of three when arranging plants on shelves, and the results always look more relaxed than paired sets.
The triangle grouping trick
Place three plants in a triangle formation, with the tallest plant at the back and two shorter plants in front at different distances. The triangle creates depth and movement, and the eye reads the group as one styled composition rather than three separate pots. This is the same trick interior designers use for bookshelves and mantels.
Vary texture, color, and leaf shape
A group of three identical plants in matching pots looks like a store display. Mix leaf shapes (broad, strappy, trailing), colors (deep green, variegated, silver), and textures (glossy, matte, fuzzy) to create contrast. My favorite combination is a snake plant, a calathea, and a trailing pothos. Their textures contrast enough to keep the eye moving.
Choose Planters That Complement Your Interior Style
Planter choice is where indoor plant styling becomes interior design. The best planters support plant health through proper drainage and sizing while also tying plants into the rest of your decor. When selecting planters, I think about three things: material, scale, and drainage.
Match planter material to design style
Different interiors call for different planter materials. Terracotta works for bohemian, Mediterranean, and rustic spaces. Ceramic in matte or glazed finishes fits modern and Scandinavian rooms. Brass, concrete, and matte black metal suit industrial and mid-century modern styles. Woven baskets and seagrass planters pair well with coastal and natural interiors. Choose one or two materials and repeat them across the room for cohesion.
Use the cache pot method for flexibility
A cache pot is a decorative outer pot with no drainage hole that holds a functional inner pot. This method lets you swap the outer pot as your style evolves without repotting the plant. It also protects surfaces from water damage. I use cache pots for almost everything in my living room and switch them seasonally to refresh the look without buying new plants.
Scale planters to plant and room
A tiny pot on a large table looks lost, and an oversized pot dwarfs a small plant. The rule of thumb is that the planter should be roughly one-third the height of a mature plant. For a 24-inch tall plant, choose a pot that is 6 to 8 inches tall. Scale the planter to the room as well. A grand entryway can handle a large floor planter, while a small apartment shelf needs smaller pots to keep proportions balanced.
Room-by-Room Indoor Plant Styling Guide
Different rooms have different light, humidity, and foot traffic, so the best plants and arrangements vary by space. Here is how I style plants in each main room of a home.
Living room and entryway
The living room is the highest impact room because it sets the tone for the whole home. Place one large floor plant in a corner, group two or three medium plants on a side table or shelf, and add one trailing plant on a high shelf or in a hanging planter. The entryway benefits from a single statement plant just inside the door, like a snake plant or ZZ plant that tolerates lower light and varying conditions.
Bedroom styling
Bedrooms call for calm, low-maintenance plants that improve air quality without demanding attention. Snake plants, pothos, and peace lilies release oxygen at night and tolerate the lower light of most bedrooms. Place one or two on a nightstand or dresser, and add a small plant on a windowsill. Avoid overly fragrant plants in bedrooms if you are sensitive to scents.
Kitchen herb arrangement
The kitchen is the natural home for edible plants. Arrange herbs in a row on the windowsill, group them in a window box, or hang small planters from a rail. Basil, parsley, mint, and rosemary all thrive in kitchen light and humidity. I keep a small herb garden above the sink and reach for fresh herbs every time I cook, which makes the arrangement both beautiful and useful.
Bathroom humidity-friendly plants
Bathrooms are ideal for tropical plants that love humidity. Ferns, pothos, philodendrons, and air plants all thrive in the steamy conditions of a bathroom. Place a fern on a counter, hang a pothos near the shower, or set a small air plant on a shelf. The humidity does the work for you, and the plants soften the hard surfaces of tile and porcelain.
Use Vertical Space for Plant Display
When floor and surface space run out, the wall is your next styling surface. Vertical placement is one of the most powerful indoor plant styling techniques because it adds greenery without using valuable real estate. In small apartments, vertical space is often the only space.
Plant ladders and tiered stands
A plant ladder or tiered stand lets you display plants at multiple heights on a small footprint. A single ladder can hold five to seven plants in the space of one floor pot. I keep a wooden ladder in my home office and use it to display a rotation of small to medium plants. The ladder itself becomes a design object when not in use.
Hanging planters and macrame
Hanging planters free up surface space and add visual interest at eye level and above. Macrame hangers suit bohemian and Scandinavian interiors, while modern metal hangers work in contemporary spaces. Hang plants near windows for light, or in corners to fill empty space. A cluster of three hanging plants at different heights creates a striking green sculpture.
Floating shelves and wall mounts
Floating shelves turn walls into plant galleries. Style shelves like bookcases: vary plant heights, mix trailing and upright plants, and leave some negative space so the arrangement does not feel crowded. Wall-mounted planters and pocket planters are another option for renters who want greenery without sacrificing floor space.
Common Plant Arrangement Mistakes to Avoid
Even with the best intentions, a few common mistakes can ruin a styled plant arrangement. I have made every one of these, and recognizing them early saves plants and prevents frustration.
Placing plants by looks alone
The most common mistake is choosing a plant’s spot based on aesthetics before considering light. A gorgeous fiddle leaf fig in a dark corner will drop leaves within months. Always check light conditions first, then style. If the perfect spot is too dark, choose a low-light plant for that spot or add a grow light.
Scaling planters incorrectly
Planters that are too small root-bind plants and limit growth. Planters that are too large hold excess moisture and cause root rot. A newly potted plant should have about one to two inches of space around its root ball. Repot every 12 to 18 months for fast-growing plants, every two to three years for slower growers.
Forgetting drainage and rotation
Plants without drainage holes drown quickly. Always use pots with drainage, or use the cache pot method with a functional inner pot. Rotate plants a quarter turn every week so they grow evenly toward the light. I set a Sunday reminder to rotate all my plants, and the consistency keeps every plant looking balanced from every angle.
Small Space and Apartment Plant Styling Tips
Small spaces demand smarter plant styling. The trick is to layer plants vertically, choose compact varieties, and use multi-functional furniture. Floating shelves, hanging planters, and plant ladders let you grow a full collection in a studio apartment. Choose smaller plant varieties like pilea, air plants, and mini succulents that thrive on shelves without taking over the room.
Use corners aggressively. A floor plant in a corner adds height without using wall space. Place a tall plant behind a sofa or chair to draw the eye up and make the room feel taller. In a small apartment, one statement plant can do more than five scattered ones.
Frequently Asked Questions
How do I arrange my indoor plants?
Start by matching each plant to your light zones, then arrange them in three height layers: floor plants for anchoring, surface plants for the middle layer, and elevated plants for vertical interest. Group plants in odd numbers of three or five, and vary leaf shape, size, and texture within each group for visual balance.
What indoor plants look good together?
Plants with contrasting leaf shapes, sizes, and textures look good together. A classic combination is a tall upright plant like a snake plant, a medium bushy plant like a calathea, and a trailing plant like pothos. Mix variegated leaves with solid greens, and pair glossy leaves with matte or fuzzy textures for contrast.
How to tastefully decorate with plants?
Tasteful plant decoration starts with restraint and grouping. Place plants in odd numbers, leave negative space between groups, and match planters to your interior style. Use a consistent planter material across the room for cohesion, and treat each plant group as a vignette rather than scattering individual pots.
Do houseplants like to be grouped together?
Yes, most houseplants benefit from being grouped together because they create a shared humid microclimate. Grouping plants also boosts visual styling, and the arrangement looks intentional. Group plants with similar light and water needs together to keep them all healthy.
How often should I rotate my indoor plants?
Rotate indoor plants a quarter turn once a week so they grow evenly toward the light. Without rotation, plants lean toward the window and lose their balanced, styled shape. Weekly rotation keeps plants symmetric and prevents one side from becoming sparse.
How many plants do I need to style a room?
A single room can be styled with as few as three plants arranged in a triangle: one floor, one surface, and one elevated. Larger collections work better when grouped in odd numbers of three or five, with empty space between groups so the eye can rest and the styling looks intentional rather than crowded.
Start Arranging Your Plants Today
Learning how to arrange plants indoors is a skill that compounds over time. The plants you have today will tell you what they need through their growth, color, and leaf shape. The framework is simple: match light first, layer at three heights, group in odd numbers, match planters to your style, and rotate weekly. These five habits are the difference between a collection of struggling pots and a styled, thriving indoor garden.
Pick one room this week and apply the three-zone height layering framework. Start with one floor plant, one surface plant, and one elevated plant. Watch how the room transforms, and use what you learn to tackle the next room. In 2026, the best indoor plant styling is the kind that keeps both plants and people happy.