
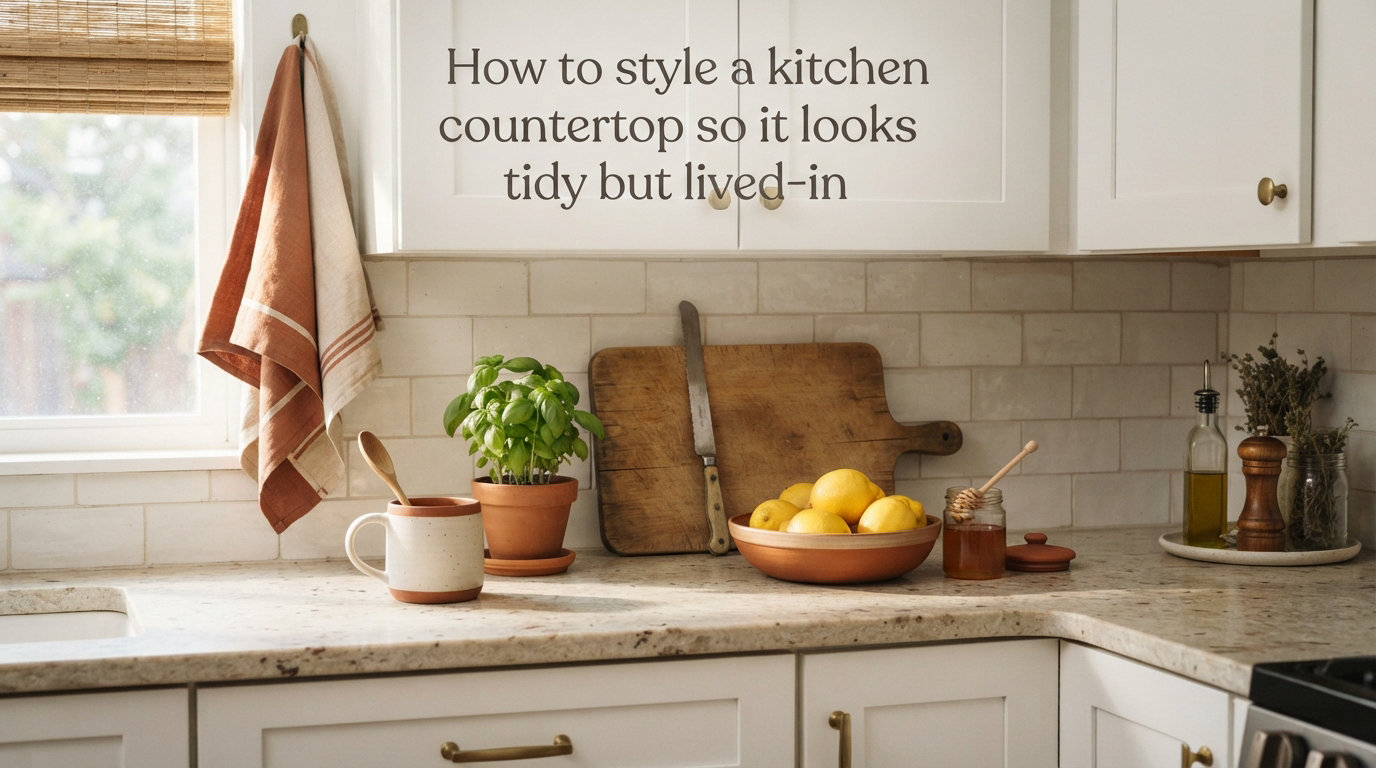
I have tested kitchen countertop styling on my own counters for years, and I keep coming back to the same tension. A perfectly empty counter looks like a show home. A fully loaded counter looks like chaos. The sweet spot sits in between, and that is what this guide is built to help you reach.
If your counters feel either too sterile or too cluttered, this walk-through will give you a clear system. We will cover decluttering, trays, decanting, wood texture, plants, odd-number groupings, appliance management, wall storage, and small or rental kitchen workarounds. By the end, you will know exactly how to style a kitchen countertop so it looks tidy but lived-in.
One quick note before we begin. I am assuming you actually cook. This guide is not for a kitchen that exists only to look pretty. Every tip below has been tested in a working kitchen where real meals happen most nights of the week. If that sounds like yours, read on.
Table of Contents
Quick Tips for a Tidy but Lived-In Counter
Before we go step by step, here is the scannable version. If you only have two minutes, copy this list.
Edit first, style second. Remove anything that does not earn its spot.
Use trays to corral oils, soaps, and salt into one tidy zone.
Decant daily-use items into matching glass or ceramic containers.
Layer a wood cutting board against the backsplash for instant warmth.
Add one living thing: a plant, a stem, or a bowl of citrus.
Group decor in odd numbers, especially threes.
Hide or upgrade the appliances that crowd the visual field.
Move anything you only use weekly into a cabinet or drawer.
Leave at least 30 percent of the counter empty as a wipe-down zone.
How to Style a Kitchen Countertop So It Looks Tidy but Lived-In
Kitchen countertop styling is the practice of arranging the items on your counter so the space reads as calm and intentional, while still feeling warm and personal. The “lived-in” part comes from signs of daily life. The “tidy” part comes from editing, grouping, and giving every object a job or a home.
The goal is not a magazine shoot. It is a counter you can actually cook on, wipe down in three minutes, and enjoy with your morning coffee. Every tip below is tested in real kitchens, including mine.
Step 1: Declutter Before You Style Anything
No amount of trays or vases will fix a counter that is doing five jobs at once. Decluttering is the non-negotiable first move.
Pull everything off the counter and put it on the dining table. Sort into three piles. Keep, relocate, and donate. The relocate pile goes into drawers, cabinets, or a pantry. The donate pile leaves the kitchen within the week.
I do this reset twice a year and my counters always look 40 percent better within twenty minutes. The pile on my table is humbling, and that is the point.
If a full reset feels overwhelming, try a half-reset. Clear only one zone, like the area next to the stove, and work through it. Smaller edits still build the muscle, and the visible progress keeps you going.
Step 2: Use Trays to Create Zones and Corral Items
A tray turns a chaotic cluster into a single intentional vignette. It is the single most powerful tool in kitchen countertop styling.
Pick trays in materials that match your kitchen: marble for a calm, neutral kitchen, wood for warmth, or woven rattan for texture. A rectangular tray works along the back of the counter. A round tray works in a corner or in front of a sink.
Group like items on each tray. One tray for cooking oils and salt. One tray for coffee supplies. One tray for hand soap and lotion near the sink. When you wipe down the counter, you pick up the tray, wipe under it, and set it back. That tiny habit keeps things tidy for years.
The zone concept matters as much as the tray. A zone is just a small area with a single purpose: a coffee zone, a cooking zone, a cleaning zone. Once a zone has a job, anything that does not fit that job is easier to spot and remove.
Step 3: Decant Everyday Items into Pretty Containers
Original packaging is the silent killer of pretty kitchen counters. Bright plastic bottles, mismatched labels, and bulk bags all add visual noise. Decanting solves this in one move.
Pour dish soap into a glass pump. Move pasta into a tall glass jar. Keep sugar and flour in matching ceramic canisters. Coffee into a sealed tin. The rule is simple: if you use it daily, it deserves a pretty home.
A reader named Juanita once told me she swapped her black electric kettle for a white one with a wood handle and it changed her whole counter. I tried the same with my dish soap and salt cellar, and she was right. Small swaps add up.
If you cannot find matching containers, choose a single material instead. All clear glass reads as a set, even when the shapes vary. All matte ceramic reads as a set, even when the colors are different. Cohesion in material beats matching labels every time.
Step 4: Add Texture with Cutting Boards and Wood Elements
Most kitchens are dominated by hard, reflective surfaces: stone counters, tile backsplashes, steel appliances. Wood is the fastest way to soften that mix and add warmth.
Lean a wood cutting board against the backsplash behind your stove. Layer a smaller board in front of it. Stack two to three boards of different shapes and grains to create depth. Add a wooden spoon rest or a small wood bowl for keys and odds.
Boards are functional first. You will actually use them for chopping, which means they earn their counter spot without guilt.
Choose boards that complement each other rather than match exactly. A round oak board next to a long walnut board reads intentional, not staged. If you cannot buy new boards, thrift stores and farmers markets often have beautiful vintage ones for a few dollars.
Step 5: Bring Life with Plants, Flowers, or Branches
Living things break the grid of a kitchen. A single plant in a ceramic pot tells the eye that someone lives here and cares about this space.
For sunny counters, a small potted herb like basil or rosemary doubles as decor and a cooking tool. For shaded spots, a pothos or snake plant is hard to kill. For a quick seasonal lift, a single branch in a tall vase lasts a week and looks expensive.
If real plants are not your thing, a bowl of lemons or limes reads as living color and costs almost nothing. I keep a wooden bowl of citrus on my counter year-round and swap the contents with the seasons.
Skip the fake plants. They collect dust, and the eye reads them as dust collectors. If you travel often or forget to water, choose one tough plant in a pretty pot, then commit to a two-second weekly check. That is all most kitchen plants need.
Step 6: Apply the Rule of Odd Numbers for Groupings
Designers group decor in odd numbers because odd groupings feel more natural to the eye. Three is the sweet spot for most counters.
Build a vignette of three: a vase, a candle, and a small stack of cookbooks. Or a plant, a salt bowl, and a piece of fruit. Vary the heights so the tallest item sits at the back or off-center.
The eye reads a triangle as balanced without being symmetrical. That subtle asymmetry is what separates “decorated” from “decorated by a designer”.
Resist the urge to add a fourth piece to balance it out. If a vignette feels off, swap one of the items rather than adding to it. Three is enough, five is too many.
Step 7: Manage Appliances: Hide, Upgrade, or Move Them
Appliances are usually the biggest visual weight on any counter. The trick is to be honest about which ones you actually use every day.
Daily-use appliances like a coffee maker earn their spot. Move weekly-use items like a stand mixer into a cabinet or onto a butcher block shelf. Put rarely used gadgets in a pantry or a lower drawer.
For the appliances that stay, upgrade the look. A matte kettle reads quieter than a chrome one. A wood-handled toaster disappears visually next to a wood cutting board. These small upgrades are cheaper than a full remodel and they completely change the counter.
A butcher block rolling cart is a great middle ground for big appliances. It hides the appliance when you want a clean look and rolls it forward when you actually need it. Look for one with a wood top so it doubles as extra prep space when the appliance is parked.
Step 8: Use Wall Storage to Free Up Counter Space
If your counter is the only flat surface you have, the wall becomes your best friend. Vertical storage pulls the eye up and clears the work zone.
A floating shelf above the counter is a styling opportunity and a storage one. Style it with the same rule of three. A row of hooks under a cabinet holds mugs, utensils, or a small pan. A magnetic strip on the backsplash holds knives and metal tools.
Walls are also the right place for things you want visible but not on the work surface. A pretty olive oil bottle, a row of spices, or a leaning cookbook all work better on a shelf than crowded onto the counter.
Keep wall decor tied to the kitchen. Avoid generic wall art in this zone. A pretty plate on display, a small framed recipe card, or a piece of vintage signage will feel connected to the room.
Small Kitchen Counter Solutions That Actually Work
Small kitchens need different rules. You cannot edit your way to more square footage, but you can edit your way to a counter that breathes.
Choose one zone for cooking prep and keep it completely clear. Use a two-tier basket under the upper cabinet to stack produce vertically. Hang measuring cups and small tools on a rail to keep them off the surface. Limit your visible decor to one or two items, never more.
In my last apartment, I had roughly four square feet of counter. I kept a single wood board, a small plant, and a tray with salt and oil. That was it. The counter looked intentional because the eye had somewhere to rest.
If you have less than six square feet of total counter, skip the tray and use a single small board as your only surface accent. Even better, store produce in a wall-mounted basket so it does not eat your prep zone. A reader named Emily told me her two-tier wire basket under the upper cabinet changed her small kitchen completely, and I agree.
Rental-Friendly Styling Ideas (No Drilling Needed)
Renters can absolutely style a counter beautifully without losing their security deposit. The trick is choosing tools that grip, rest, or hang without holes.
Use adhesive hooks under cabinets for mugs and small utensils. Try a tension rod inside a cabinet to hang spray bottles. Place a freestanding spice rack on the counter instead of mounting one. Lean a cutting board against the wall rather than hanging it.
Command strips hold surprisingly well for lightweight decor like small frames or a tiny shelf. Removable peel-and-stick wallpaper behind open shelves is another renter-safe way to add personality. None of these leave marks.
Take photos of your counter before and after each change so you can rebuild your setup at the next place. Most renter-friendly styling travels well, but the photos save you an hour of guessing when you unpack.
Common Countertop Clutter Mistakes to Avoid
Even well-intentioned counters go wrong in predictable ways. Watch for these common slip-ups.
Holding onto appliances you used once. Donate or store them.
Leaving mail, keys, and wallets on the counter. Add a small bowl for these near the entry instead.
Buying decor that does not match your daily life. Pretty but unused items become clutter fast.
Over-styling with too many small objects. Three vignettes beat ten.
Skipping the wipe-down zone. Leave at least 30 percent of the counter empty for real work.
Mixing too many materials. Two or three finishes beat a counter of clashing metals and woods.
Seasonal Rotation: Keep Your Counter Fresh Year-Round
A lived-in counter evolves with the year. The trick is to rotate one or two elements each season, not to redo the whole counter every quarter.
In spring, swap heavy wood accents for fresh greens and a small vase of tulips. In summer, fill a bowl with stone fruit. In fall, lean a small pumpkin or a stack of mini gourds next to your cutting board. In winter, switch to evergreen sprigs and a cinnamon-scented candle.
I keep a small bin in my pantry with seasonal swaps. Pulling two items out and putting two items in takes five minutes and keeps the counter from feeling static.
The simplest seasonal swap is also the cheapest. A bowl of whatever fruit is in season does the entire job on its own. Pears in autumn, mandarins in winter, strawberries in spring. The fruit goes bad before it goes stale, and you always have a reason to refresh.
Budget vs. High-End Styling Options
You do not need a designer budget to get a designer-looking counter. Most of the rules above cost almost nothing if you work with what you already own.
On a tight budget, rely on editing, trays, and decanting. A $15 wood board, three thrifted glass jars, and a $10 tray can transform a counter for under $40. Repurpose what you already have: a cake stand becomes a soap tray, a vintage bowl becomes a fruit bowl, a pretty mug holds utensils.
For a higher-end look, invest in one anchor piece like a marble tray, a hand-thrown ceramic vase, or a high-quality wood board. One beautiful object beats five mid-range ones every time. Pair it with a real plant and you have a counter that looks like a magazine spread for a fraction of the price.
Mid-range buyers should split the difference. Buy one anchor piece you love and build the rest from thrifted, gifted, or repurpose-able items. This is how most designers furnish their own homes, and it reads more interesting than a room bought in one shopping trip.
FAQs
How to make kitchen counters look less cluttered?
Start by removing everything that does not belong on the counter, then group what is left into trays by function. Keep at least 30 percent of the surface empty and limit visible decor to one or two vignettes in odd numbers.
What is the new trend for kitchen counters?
The current trend for kitchen counters is the tidy but lived-in look, which mixes functional items like cutting boards and soap dispensers with warm touches like wood, plants, and seasonal fruit in a curated, edited way.
What are common kitchen countertop clutter mistakes to avoid?
Holding on to rarely used appliances, leaving mail and keys on the counter, over-decorating with too many small objects, mixing too many materials, and failing to leave a clear prep zone are the biggest countertop clutter mistakes.
What are some clever ways to organize my countertop?
Use trays to corral oils and soaps into one zone, decant everyday items into matching glass containers, hang utensils on a rail or hooks, and store produce vertically in a two-tier basket to free up space.
How do I style a small kitchen counter without losing function?
In a small kitchen, keep only one prep zone clear, limit visible decor to one or two items, use vertical storage like wall shelves and under-cabinet hooks, and edit aggressively so the counter stays functional for cooking.
The Tidy but Lived-In Counter, Recap
Kitchen countertop styling comes down to a few repeatable moves. Edit first. Group with trays. Decant the daily-use items into pretty containers. Add wood for warmth. Bring in one living element. Group in odd numbers. Manage your appliances. Use the wall when the counter is full.
Pick one or two tips from this guide and try them this weekend. Do not try all eight at once. In my experience, the counters that feel best are the ones that evolved slowly, one small swap at a time. By 2026, your kitchen can feel like the warm, tidy, lived-in space you actually want to cook in.