
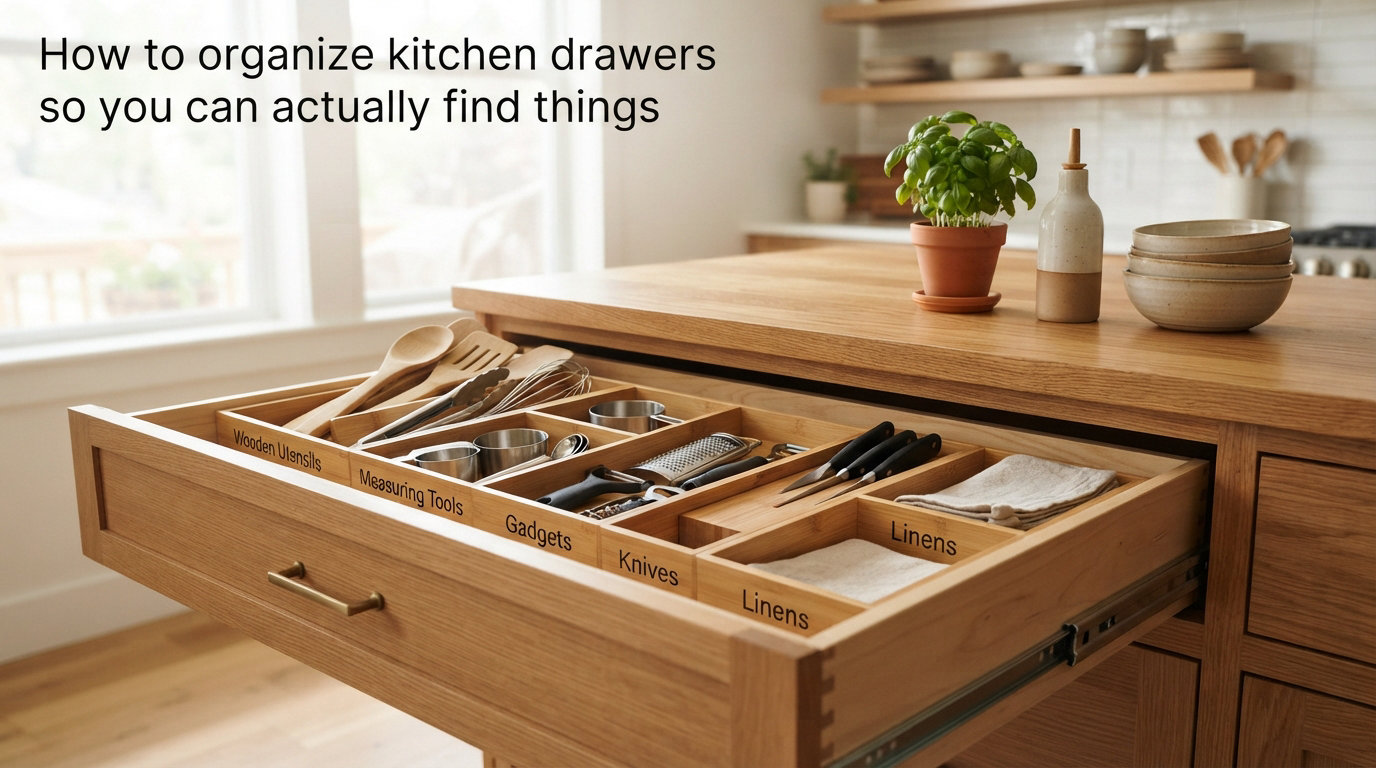
Learning how to organize kitchen drawers so you can actually find things comes down to five steps: declutter everything first, group items by how often you use them, measure your drawers before buying anything, pick the right dividers for each drawer type, and build a maintenance habit so the system sticks. Most people skip straight to buying organizers and wonder why their drawers look messy again within two weeks. I have reorganized more kitchen drawers than I can count, across tiny apartment kitchenettes and family-sized kitchens, and the approach below works every time.
If you are tired of digging through a tangle of spatulas and takeout menus every time you cook, this guide breaks down exactly what to do. We will cover decluttering principles, drawer-by-drawer organization strategies, divider options for every budget, size guides, renter-friendly solutions, and maintenance tips that prevent relapse. By the end, you will have a repeatable system you can apply to every drawer in your kitchen.
Here is a quick-start checklist of five actions you can take right now before reading further:
Empty one drawer completely. Take everything out and lay it on the counter so you can see what you actually own.
Toss the duplicates and the broken items. You do not need four garlic presses.
Measure the interior width, depth, and height of that drawer with a tape measure.
Group items into three piles: keep, relocate to another room, and donate or toss.
Assign the most-used items to the drawer closest to where you cook.
Do those five things and you are already ahead of most people. Now let us build the full system.
Table of Contents
How to Organize Kitchen Drawers: Start With Decluttering?
Decluttering before organizing is the single most important step. If you try to organize clutter, you are just arranging junk more neatly, and it will fall apart fast. Every professional organizer and every Reddit thread on kitchen drawer organization says the same thing: remove what you do not use before you buy a single divider.
Here is the method I use, adapted from community-vetted approaches on r/declutter and r/organizing:
Empty the entire drawer. Take every single item out and place it on your counter or table. Seeing everything laid flat is eye-opening.
Sort into categories. Group like items together so you can see duplicates at a glance. You might discover you own three bottle openers and five whisks.
Purge aggressively. Toss broken items, donate duplicates, and relocate anything that does not belong in the kitchen. That screwdriver and those random batteries need to go.
Be honest about what you cook. If you have not used a gadget in the last year, it probably does not deserve drawer space. Consider storing rarely used items in a less accessible cabinet.
Set a duplicate limit. Keep one or two of each tool, not five. This keeps drawers from overflowing and makes items easy to grab.
A common pain point people share in forums is having too many duplicate utensils. Multiple peelers, several versions of the same spatula, and a graveyard of gadgets from past kitchen phases. Be ruthless here. The fewer items in the drawer, the easier it is to keep organized.
Map Out Your Kitchen Drawer Zones
Organizing kitchen drawers works best when you assign zones based on how often you use each item. The goal is to put your most-used tools within arm’s reach of where you actually cook and prep food. A general rule from the r/HomeImprovement community puts it well: place the items you use most closest to your hand reach zone.
Think of your kitchen in terms of work zones:
Prep zone (near your cutting board): knives, peelers, measuring spoons, and cooking utensils go in the drawers right here.
Cooking zone (next to the stove): spatulas, tongs, ladles, and oven mitts belong in drawers closest to the range.
Cleanup zone (near the sink and dishwasher): dish towels, sponges, and food storage containers make sense here.
Baking zone (if you have one): measuring cups, baking tools, and pastry supplies group together near your mixing area.
Items used daily, like flatware and cooking spoons, should live in the drawers you reach for without thinking. Items used weekly or monthly can go in deeper or less convenient drawers. Seasonal or specialty tools can move to upper cabinets or a pantry. When everything has a logical home based on frequency of use, you stop losing things.
Measure Your Drawers Before Buying Anything
Measuring your drawers before purchasing organizers saves money and frustration. One of the most common complaints in organizing forums is that standard organizers do not fit unique drawer dimensions. People buy a cutlery tray, get it home, and discover it is a half-inch too wide or rattles around because it is too narrow.
Here is exactly what to measure:
Interior width: Measure from the inside left wall to the inside right wall, not the exterior of the drawer box.
Interior depth (front to back): Measure from the inside back wall to the inside front of the drawer.
Interior height: Measure from the drawer bottom to the underside of the counter or drawer above it. This tells you the maximum height of any organizer you can fit.
Drawer slide clearance: Account for any rails or tracks that extend into the drawer interior.
Write these numbers down for every drawer. Take a photo of each measurement with your phone so you have it when you are shopping. If you are buying online, compare your measurements against the product dimensions listed. Many organizers are labeled by the drawer size they fit, such as 15-inch or 18-inch, so knowing your widths makes selection much easier.
Also consider the weight of what you plan to store. Heavy items like cast iron can damage drawer bottoms and strain drawer slides. If you are storing heavy pots in a deep drawer, check that your slides are rated for the load.
How to Organize Kitchen Drawers by Type
Different drawer types need different organization strategies. A cutlery tray that works perfectly for forks and spoons is useless for baking supplies. Let us break down how to handle each common kitchen drawer type.
Flatware and Cutlery Drawer
The flatware drawer is usually the easiest to organize and a great place to start. A standard cutlery tray with divided compartments handles forks, knives, spoons, and serving utensils. Look for a tray that fits snugly across the width of your drawer so it does not slide around when you open and close it.
Expandable cutlery trays are my go-to because they adjust to fit different drawer widths. They typically start at around 13 inches and expand up to 20 inches or more. This flexibility means you do not have to guess your exact size, and the tray grows with you if you move to a new kitchen.
Keep the compartments logical: forks in one section, knives in another, soup spoons separate from teaspoons. Place serving utensils in the larger compartments or in a separate drawer if you have the space. If items shift when you open the drawer, add a non-slip drawer liner underneath the tray.
Cooking Utensil Drawer
Cooking utensils like spatulas, tongs, whisks, and ladles are bulkier than flatware and need deeper compartments. A traditional cutlery tray often is not deep enough for these items. Instead, use a utensil organizer with wider, deeper slots or standing dividers that keep tall tools upright.
One approach I like is to group utensils by cooking activity. Put all the stirring and flipping tools (spatulas, wooden spoons, tongs) in one section. Place measuring tools in another. This way, when you are making a stir-fry, you grab everything from one area instead of hunting across the drawer.
Limit the number of utensils to what you realistically use. Forums are full of people who own ten spatulas but only use two. Keep your top three or four of each type and store or donate the rest. Less clutter means you can actually see and grab what you need.
Knife Storage Drawer
Storing knives in a drawer keeps them off the counter and out of reach of small hands. An in-drawer knife block or a knife organizer tray with slots for each blade is the safest option. These trays hold knives flat with the blades facing inward, protecting both the blades and your fingers.
Make sure the knife tray you choose fits your drawer height. Some in-drawer blocks are tall enough that the drawer will not close fully. Measure the interior height carefully, including the gap between the drawer top and the counter.
Keep the knives you use daily in the drawer closest to your prep area. Specialty knives that come out a few times a year can go in a knife roll or a less accessible spot. Sharpen your knives regularly because a sharp knife in a designated slot is safer than a dull one buried under clutter.
Baking Supplies Drawer
Baking supplies like measuring cups, measuring spoons, piping bags, cookie cutters, and pastry tools need small compartments. A drawer organizer with adjustable dividers works well here because baking tools come in odd shapes and sizes.
Try grouping by function. Keep dry measuring cups together, liquid measuring cups in another section, and measuring spoons in a small compartment or on a ring. Cookie cutters and small molds can go in a shallow bin within the drawer so they do not scatter.
If you bake frequently, place this drawer near your mixing station. If baking is a once-a-month activity, this drawer can live farther from your main prep zone. Labeling compartments helps other household members put things back in the right spot.
Food Storage and Wrap Drawer
Food storage containers, lids, plastic wrap, aluminum foil, and sandwich bags are notorious for turning into a chaotic mess. The key to organizing this drawer is separating containers from lids and corralling loose items.
Stack containers by size with the largest on the bottom. Store lids vertically in a lid organizer or stand them upright in a bin. This makes it easy to grab the right size container and matching lid without pulling everything out.
Keep boxes of plastic wrap and foil in a separate compartment or standing upright with dividers. Sandwich bags, freezer bags, and small zip-top bags can go in a smaller bin. If you use reusable silicone bags or beeswax wraps, give those their own section so they do not get lost among disposables.
Kitchen Towel and Linen Drawer
Kitchen towels, dishcloths, oven mitts, and hot pads can be folded and stacked neatly in a drawer near the sink or stove. You do not need fancy organizers for this drawer, but a simple divider to separate towels from mitts keeps things tidy.
Fold towels uniformly so they stack flat and you can see all of them at once. Separate clean dish towels from cleaning rags so you never grab the wrong one. Oven mitts and hot pads can go in a side compartment or a smaller section.
If you have limited drawer space, consider rolling towels instead of folding them. Rolled towels take up less vertical space and you can see each one without disturbing the stack.
Deep Drawer Strategies for Pots and Pans
Deep drawers are a different beast. They hold pots, pans, lids, and bulky items that do not fit in standard-depth drawers. Deep drawers need different solutions than shallow ones, and forum users consistently emphasize this point.
Peg board systems are one of the best solutions for deep drawers. Wooden or plastic pegs insert into a base board and create adjustable compartments that hold pots and pans in place. You can rearrange the pegs to fit different pot sizes, and the system prevents items from sliding around when you open the drawer.
Stack pots by size with the largest on the bottom. Store lids separately, either on a lid rack standing upright or nested between pots. If your deep drawer is tall enough, consider a two-tier organization system with a shallow tray on top for smaller items and pots below.
Watch the weight. Cast iron skillets and Dutch ovens are heavy, and loading too many in one drawer can strain the slides. Distribute weight evenly and check your drawer’s weight rating before filling it with heavy cookware.
Small and Kitchenette Drawer Solutions
Small kitchens and kitchenettes present a unique challenge that most guides skip entirely. When you only have two or three narrow drawers, every inch matters. The strategy here is to prioritize multi-purpose tools and use vertical space.
In a narrow drawer (under 12 inches wide), skip traditional cutlery trays and use spring-loaded dividers or small bins instead. These take up less width and let you create custom compartments. Choose tools that do double duty, like a box grater that also measures, or nesting mixing bowls that store inside each other.
Wall-mounted magnetic strips can free up drawer space by holding knives or metal utensils on the backsplash. Over-the-cabinet-door hooks add storage for towels or oven mitts without using drawer space at all. In a kitchenette, sometimes the best drawer organization is having fewer items in the drawer and finding creative homes elsewhere.
Choose the Right Drawer Dividers and Organizers
Picking the right dividers and organizers makes the difference between a system that lasts and one that falls apart in a month. There is no one-size-fits-all answer, but understanding the options helps you choose what works for your kitchen and your budget.
Bamboo vs Plastic Dividers
Bamboo drawer dividers are the preferred choice among organizing communities on Reddit. Bamboo is more durable than plastic, looks better in open drawers, and tends to last longer. It also has natural moisture resistance, which matters in a kitchen environment.
Plastic organizers are cheaper and lighter. They work fine for flatware and lightweight items, but they can crack over time, especially in deep drawers holding heavier tools. Plastic also tends to slide around more than bamboo unless you add a non-slip liner.
If budget allows, go with bamboo for your main drawers and plastic for lighter-duty storage. If you are on a tight budget, plastic organizers still do the job. The material matters less than making sure the organizer fits your drawer properly.
Adjustable and Expandable Options
Adjustable and expandable organizers are worth the investment because they adapt to your drawer dimensions. Expandable cutlery trays stretch to fill the width of your drawer, eliminating gaps where items slide around. Adjustable dividers let you create custom compartment sizes for odd-shaped items.
Spring-loaded drawer dividers are another adjustable option. These are tension-fit dividers that you press into place between the drawer walls. They are great for creating custom sections in drawers where standard trays do not fit, and they require no tools to install.
For maximum flexibility, combine an expandable tray for flatware with spring-loaded dividers for utensils. This combo handles most kitchen drawer configurations without permanent modifications.
Renter-Friendly Solutions Without Drilling
If you rent, you probably cannot drill into your cabinets or make permanent changes. The good news is that most drawer organization requires zero permanent modification. Spring-loaded dividers, tension-fit trays, and freestanding organizers all work without a single screw.
Non-slip drawer liners are a renter’s best friend. They keep organizers from sliding, protect drawer bottoms from scratches, and add no permanent hardware. Cut them to size and lay them flat. When you move out, simply pull them up.
Command strips and removable adhesive hooks can secure lightweight organizers to drawer walls if needed. Just make sure whatever you use is truly removable and will not damage the drawer finish. Avoid anything that requires screws, brackets, or permanent adhesive.
DIY Drawer Dividers on a Budget
You do not need to spend a fortune to organize your drawers. Some of the best drawer dividers are DIY projects using materials you already have or can buy cheaply. Small cardboard boxes, repurposed tin cans, and even folded cardboard can create functional compartments.
Cut cereal boxes to the height of your drawer and arrange them side by side to create custom dividers. Wrap them in contact paper or decorative paper for a cleaner look. Small mason jars or tin cans work well for corralling loose items like rubber bands, clips, and bag ties.
Balsa wood strips glued together can create a custom grid that fits your drawer exactly. This takes a bit more effort but gives you a perfectly tailored solution for a fraction of what a commercial organizer costs. The DIY approach is especially useful for drawers with unusual dimensions that no standard product fits.
Drawer Size Guide: What Organizer Fits Your Drawer
Matching the organizer to the drawer size prevents wasted space and wasted money. Kitchen drawers typically come in standard widths, and knowing yours makes shopping much simpler. IKEA organizes its entire kitchen drawer system around these standard sizes, and the same dimensions apply to most cabinet brands.
Here is a breakdown of common drawer widths and what works in each:
15-inch drawers: These are common in smaller kitchens and kitchenettes. A compact cutlery tray or two small 6-inch utensil trays fit well. You may need to leave part of the drawer open for bulky items that do not fit in a tray.
18-inch drawers: The most common kitchen drawer size. A standard expandable cutlery tray fits nicely with room to spare. Most off-the-shelf organizers are designed for this width.
24-inch drawers: These wider drawers can hold a full-size flatware tray plus an additional utensil organizer side by side. This is also a good size for a two-tier organization system.
30-inch drawers: Typically deep drawers used for pots and pans. Peg board systems work well here. You can also fit a large flatware tray plus extra storage bins in the remaining space.
A tip from IKEA’s own organization guide: if you have leftover space after placing your organizer, do not force another tray in. Leave that gap for bulky items like serving spoons, kitchen shears, or a meat thermometer. Open space is not wasted space when it holds items that do not fit neatly into compartments.
For drawers between standard sizes, adjustable organizers are your best bet. Expandable trays bridge the gap and prevent the rattling and shifting that happens when an organizer is too small for the drawer.
Kid-Friendly Kitchen Drawer Systems
Families with kids need drawer systems that survive daily use and let children participate in the kitchen. Kid-friendly organization is a topic almost no competitor covers, but it makes a real difference for households with young helpers.
Designate a low drawer at kid height for their own items. Stock it with kid-safe utensils, their own dishes, and snacks they can grab independently. A simple divided tray keeps their items separated and makes cleanup easy for little hands.
Choose durable organizers that can take a beating. Kids are rough on drawers, so skip fragile dividers and opt for sturdy plastic or bamboo that will not crack when slammed. Avoid glass or ceramic containers inside drawers that kids access regularly.
Label compartments with pictures for pre-readers. A simple drawing of a fork, spoon, or cup on each section helps kids learn where things go and turns putting away dishes into a matching game. This builds habits early and keeps the drawer organized with less adult intervention.
Common Kitchen Drawer Organization Mistakes to Avoid
A few recurring mistakes sabotage even the best organization efforts. Learning what not to do is just as important as knowing what to do. These mistakes come straight from forum discussions where people share what went wrong with their drawer systems.
Skipping the decluttering step. Buying organizers for items you never use just creates a tidy junk drawer. Always purge first.
Buying organizers before measuring. This leads to returns, wasted money, and organizers that rattle around in too-big drawers.
Over-stuffing drawers. When every compartment is crammed full, items fall out when you open the drawer and nothing goes back in the right spot.
Ignoring weight limits. Heavy cast iron and stacked pots can damage drawer bottoms and break slides. Check weight ratings before loading up.
Not using anti-slip liners. Without something to grip the bottom, organizers slide around every time you open the drawer, and items shift and jumble together.
Putting items back in the wrong spot. If a system is too complicated, no one in the household will maintain it. Keep it simple.
The biggest mistake of all is treating organization as a one-time project. Drawers need ongoing attention. Build a simple maintenance routine and your system will last for years instead of weeks.
Maintenance Tips to Keep Drawers Organized Long-Term
Staying organized is about habits, not just the initial setup. Drawers become cluttered again quickly after organizing, and this is the number one frustration people share in forums. The fix is a simple maintenance routine.
Do a quick drawer reset once a month. Open each drawer, remove anything that wandered in from another room, and return misplaced items to their proper spots. This takes about ten minutes and prevents slow drift into chaos.
Follow a one-in, one-out rule for kitchen gadgets. Every time you bring home a new tool, remove an old one. This keeps the total number of items stable and prevents drawers from gradually filling up beyond capacity.
Add non-slip liners under all your organizers. This is the simplest fix for items that shift and jumble when you open and close drawers. A roll of drawer liner costs very little and makes a noticeable difference in how tidy your drawers stay day to day.
Involve your whole household in the system. Take five minutes to show everyone where things go and why the system works. When everyone understands the logic behind the organization, they are more likely to maintain it. Labels help a lot here, especially for kids and guests.
Reassess your system every six months. Your cooking habits change, kids grow, and kitchen needs evolve. What worked in January might not work by summer. Be willing to reorganize a drawer when it stops serving you.
FAQs
How do people organize kitchen drawers?
Most people organize kitchen drawers by first decluttering, then grouping items by how often they are used, measuring the drawer, and adding dividers or trays that fit. The most-used items go in the drawers closest to where you cook, while rarely used tools move to deeper or higher drawers. Bamboo cutlery trays, expandable organizers, and peg board systems for deep drawers are the most popular solutions.
What are some common problems with kitchen drawer organizers?
The most common problems are organizers that do not fit the drawer dimensions, items that shift and slide when the drawer opens, organizers that crack under heavy loads, and systems that are too complicated for other household members to maintain. Choosing adjustable organizers, adding non-slip liners, and keeping the system simple solves most of these issues.
Can you automate kitchen drawers?
Yes, you can add soft-close or push-to-open drawer slides that let you open drawers with a gentle push and close them without slamming. Some high-end kitchens use motorized drawer systems. For most homes, soft-close slides are the most practical upgrade because they reduce wear and prevent drawers from banging shut.
How do you decide where to put things in kitchen cabinets and drawers?
Place items based on frequency of use and proximity to where you use them. Store daily flatware and cooking utensils in drawers near your prep and cooking zones. Keep dishes near the dishwasher for easy unloading. Store baking supplies near your mixing area, and put rarely used items in higher or less accessible cabinets.
How to organize kitchen drawers without buying anything?
You can organize drawers for free using items you already have. Repurpose small boxes, tin cans, or folded cardboard as dividers. Group like items together, purge duplicates, and assign everything a designated spot. Non-slip shelf liner scraps can prevent items from sliding. The decluttering and categorizing steps cost nothing and make the biggest difference.
Conclusion
Knowing how to organize kitchen drawers so you can actually find things comes down to a simple sequence: declutter first, zone by frequency of use, measure before buying, choose the right dividers for each drawer type, and maintain the system with a monthly reset. The approach works whether you have two narrow drawers in a studio apartment or a full kitchen with deep pot drawers.
Start with one drawer today. Empty it, sort everything, toss what you do not need, and give the keepers a logical home. The momentum from organizing one drawer well usually carries you through the rest of the kitchen. Before you know it, you will be cooking without digging, and every tool will be exactly where you expect it.
Remember that the best organization system is the one you will actually maintain. Keep it simple, involve your household, and do not be afraid to adjust as your needs change. Organized drawers are not about perfection. They are about making your daily cooking routine faster, calmer, and a lot less frustrating.