
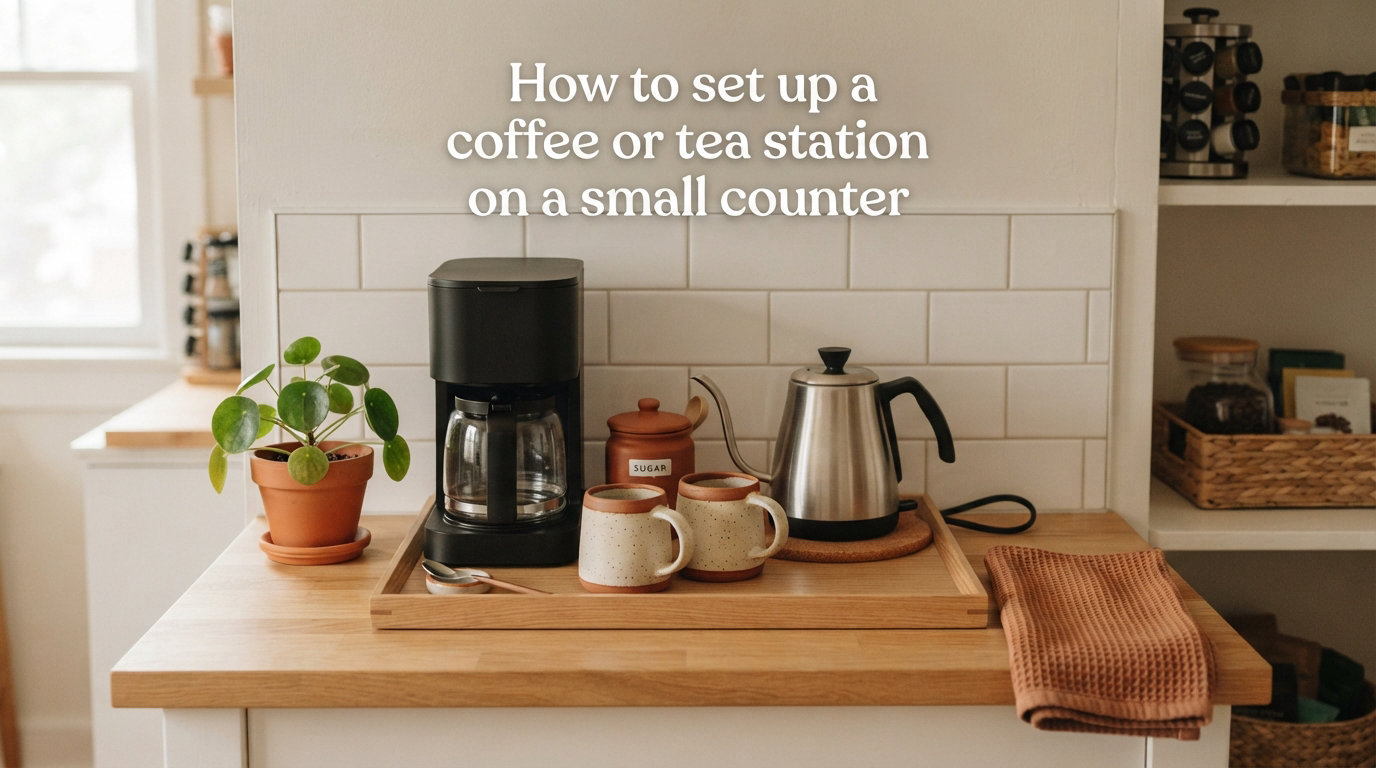
If you have ever bumped elbows with a coffee maker while trying to prep breakfast, you already know the struggle of a cramped kitchen. Learning how to set up a coffee or tea station on a small counter changes that daily frustration into a smooth, pleasant routine. A dedicated beverage zone keeps every mug, pod, and sweetener in one tidy spot so you stop hunting through cabinets at 6 a.m.
You do not need a sprawling kitchen or expensive built-in cabinetry to pull this off. With smart vertical storage, a compact appliance or two, and a few organizing tools, even a two-foot strip of counter can become a fully functional coffee bar. This guide walks through the entire process step by step, from measuring your space to choosing the right equipment to keeping it all clean.
Whether you live in a studio apartment, work from a tiny home office, or simply have a kitchen where every inch counts, the strategies below will help you build a station that looks good and works hard. I have pulled together tips from real small-space dwellers on community forums, combined them with proven organization principles, and added specific measurements so you can plan with confidence.
Table of Contents
Why a Small Counter Coffee or Tea Station Works?
A dedicated beverage station works because it groups everything you need into a single efficient zone. Instead of opening three cabinets and crossing the kitchen twice for one cup of coffee, you reach for your mug, beans, and sweetener all within arm’s reach. People on home-decorating forums consistently say the same thing: having everything in one place cuts their morning prep time dramatically.
The beauty of a small counter is that it forces intentionality. When you only have 18 to 24 inches of surface area, you naturally choose the essentials and skip the clutter. A compact coffee station ends up looking more polished than a sprawling one because every item earns its spot.
This approach also solves a common household tension. If one person drinks coffee and another prefers tea, a shared station with designated zones keeps both happy without doubling the counter footprint. You simply stack or tier the supplies so each beverage type has its own layer.
A well-planned station even helps with cord management, one of the biggest complaints in forum discussions. By positioning your appliance near an outlet and routing cords behind a riser or container, you eliminate the tangled mess that makes small kitchens look messy.
How to Set Up a Coffee or Tea Station on a Small Counter?
Setting up your station comes down to six clear steps. Follow them in order and you will have a functional, attractive beverage zone by the end of the afternoon.
Step 1: Measure and Assess Your Counter Space
Grab a tape measure and record the exact width, depth, and height of your available counter area. Most small counters offer between 18 and 30 inches of width and about 12 to 15 inches of depth before hitting a backsplash or wall. Write these numbers down because every purchase decision depends on them.
Check the vertical clearance too. If you have upper cabinets, measure from the counter surface to the bottom of the cabinet. You need at least 14 inches of clearance for most standard coffee makers, and some taller espresso machines require 16 inches or more.
Locate your nearest electrical outlet and note its position. If your ideal spot lacks a nearby outlet, consider a short, flat extension cord that runs along the backsplash rather than across the counter where it creates a tripping and visual hazard.
Step 2: Choose Your Appliance Wisely
Pick one primary brewing appliance that fits your space and your habits. For small counters, a single-serve coffee maker or a compact drip machine typically takes up the least room, often measuring just 5 to 7 inches wide. If you are a tea drinker, a slim electric kettle with a gooseneck spout handles both pour-over coffee and loose-leaf tea in one footprint.
Avoid the temptation to keep a grinder, frother, espresso machine, and kettle all on the counter at once. Store secondary tools in a nearby cabinet or drawer and pull them out only when needed. Forum users repeatedly mention that paring down to one core appliance is the single biggest space-saver.
If both coffee and tea are daily essentials in your home, consider a combination approach. A compact single-serve machine that brews both coffee and hot water for tea bags gives you two beverages from one device and one outlet.
Step 3: Build Vertical Storage Above and Behind
Vertical storage is the secret weapon of every successful small counter coffee station. When you cannot spread out, you build up. A two-tier riser placed behind your coffee maker instantly doubles your usable surface area without eating into your work zone.
Use the top tier for items you grab every morning, like sugar bowls, honey, or a small jar of coffee beans. Reserve the bottom tier for backup supplies such as extra pods, tea bags in a tin, or a container of stirrers. This keeps daily essentials at eye level while hiding the less attractive extras.
A mug tree or wall-mounted mug hooks above the station frees up significant cabinet space and keeps your most-used cups within arm’s reach. Many small-kitchen owners on forums swear by this swap because it transforms mugs from hidden clutter into a decorative element.
Step 4: Contain the Small Stuff
Loose tea bags, sugar packets, coffee pods, and stirrers are the fastest way to make a small counter look chaotic. Transfer these items into clear containers or matching jars so they look intentional rather than scattered. A set of three or four glass jars with lids takes up minimal space and instantly elevates the visual appeal.
A small turntable, sometimes called a lazy susan, is a game-changer for narrow or deep counters. Load it with jars of sweeteners, cocoa powder, and tea tins, then spin it to reach the back items without knocking things over. This single tool solves the deep-corner problem that plagues many small kitchen layouts.
Label each container if you share the station with others. Simple chalkboard labels or printed tags help everyone return items to the right spot, which keeps the station tidy day after day without nagging.
Step 5: Set Up Zones for Coffee and Tea Together
If your household includes both coffee and tea drinkers, divide the station into two vertical zones rather than two horizontal ones. Keep coffee pods or beans on one tier of your riser and tea bags or loose-leaf tins on the other. Share the appliance and mugs in the middle so neither side feels shortchanged.
This vertical division works because it respects the limited width of a small counter. Instead of placing a coffee zone on the left and a tea zone on the right, which eats up twice the linear space, you stack the two beverage types and let them share the same footprint.
Add a small basket or bin underneath the counter, inside a cabinet, or on a shelf below to hold overflow supplies. When the jars on the counter run low, you restock from the backup bin rather than cluttering the visible station with bulk packaging.
Step 6: Manage Cords and Finalize the Layout
Cord clutter is one of the top complaints in forum discussions about small kitchen stations. Position your appliance so the cord drops straight down behind it to the outlet, hidden from view. Use adhesive cord clips along the backsplash to keep the cable flush against the wall.
Step back and evaluate the finished layout. You should be able to brew a cup, add your sweetener, grab a mug, and stir your drink all without moving more than one step. If you find yourself reaching across the appliance or shuffling items around, rearrange until the flow feels natural.
Take a photo of the completed station. This gives you a reference point for restocking and helps you remember the layout if you ever need to dismantle and rebuild it after a move or deep clean.
Placement Options Compared: Counter vs Cabinet vs Cart
Choosing where to place your station is just as important as what you put on it. Here is how the three most popular options compare for small spaces.
| Option | Best For | Space Needed | Pros | Cons |
|---|---|---|---|---|
| Counter | Daily users, permanent setup | 18 to 30 inches width | Always ready, no setup needed | Permanently uses counter space |
| Slide-out Cabinet | Minimalists, hidden look | Cabinet opening, 12+ inches depth | Completely hidden when closed | Requires installation, limited height |
| Rolling Cart | Entertaining, occasional use | Floor space, 16 to 20 inches width | Mobile, adds storage shelves below | Takes up floor space, less stable |
The counter option is the most common choice because it keeps everything visible and ready. If your counter is extremely tight, a slide-out cabinet tray lets you pull the station forward when you need it and push it back out of sight when you do not.
A rolling cart works beautifully for people who only make coffee or tea occasionally or who love entertaining. You can wheel it out for guests, then tuck it into a corner or closet afterward. The shelves underneath also provide bonus storage that a flat counter cannot match.
Essential vs Nice-to-Have Checklist
Use this checklist to decide what stays on the counter and what gets stored elsewhere. The goal is to keep only daily essentials visible and tuck everything else away.
Essential Items (Keep on the Counter)
One compact brewing appliance is the centerpiece of your station. Whether it is a single-serve coffee maker, a slim drip machine, or an electric kettle, choose one that fits your space and handles your primary beverage.
Two to four everyday mugs belong on a mug tree or hook within reach. Anything beyond your daily rotation should live in a cabinet to avoid visual overload on a small surface.
One sweetener container and one spoon or stirrer holder round out the bare minimum. A sugar bowl or honey jar plus a small cup for spoons covers most daily needs without clutter.
Nice-to-Have Items (Store Nearby, Not on Counter)
A coffee grinder, milk frother, or French press can live in the cabinet directly above or below the station. Pull them out only when you want to use them and return them immediately.
Extra pods, bulk tea bags, backup coffee beans, and seasonal syrups belong in a storage bin on a shelf or inside a pantry. Restock your counter jars from these reserves rather than leaving full bags out.
Decorative touches like a small plant, a framed print, or seasonal accents are optional but add personality. Limit yourself to one decorative item so the station does not feel crowded.
Budget Planning: Start Simple and Build Up
You can build a functional coffee or tea station for very little money if you start with what you already own. Forum users on the Frugal community consistently report that budget-friendly organizing tools work just as well as expensive gadgets for keeping a small space tidy.
Phase one is entirely free. Clear your chosen counter area, gather your existing mugs, coffee or tea supplies, and your current brewing appliance. Arrange them in a logical layout and live with the setup for a week to see what works and what feels awkward.
Phase two adds affordable organizers. A two-tier riser, a set of clear jars, and a mug tree together typically cost less than a single new appliance. These three items solve most storage and organization problems on a small counter and create the biggest visual transformation.
Phase three is where you invest in a compact appliance if your current one is too large. Wait until you know your exact counter dimensions and daily routine before spending on a new machine. This prevents buyer’s remorse and ensures the new appliance truly fits your space.
The phased approach also lets you test whether you even use the station enough to justify upgrades. Some people discover that a simple kettle and jar of tea bags is all they need, while others decide a single-serve machine is worth the investment for daily convenience.
Keeping Your Station Clean and Maintained
A clean station looks better and makes your beverages taste better too. Maintenance is one of the areas competitors barely cover, so here is a practical schedule that takes minimal effort.
Daily: Wipe and Reset
After your last cup of the morning, wipe down the appliance and counter surface with a damp cloth. Return any jars or containers you moved back to their designated spots. This 30-second habit prevents coffee drips and sugar spills from building up into stubborn stains.
Weekly: Deep Clean the Appliance
Once a week, empty and wash the drip tray, water reservoir, and any removable parts of your coffee maker or kettle. Run a cleaning cycle or descale your machine according to the manufacturer instructions. This keeps coffee tasting fresh and extends the life of your appliance.
Monthly: Restock and Reorganize
At the start of each month, check your supply levels and restock jars from your backup bin. Wipe down all containers, the riser, and the backsplash area. This is also the time to discard expired tea bags, stale coffee, or items you no longer use so clutter never creeps back in.
If you use a rolling cart or slide-out tray, pull it fully out once a month and clean the surface underneath. Crumbs and dust accumulate in hidden spots and can attract pests if left unchecked.
FAQs
How to create a coffee station in a small kitchen?
Start by measuring your available counter space, then choose one compact brewing appliance, add a two-tier riser for vertical storage, and use clear containers for pods, beans, and sweeteners. Keep only daily essentials visible and store everything else in a nearby cabinet or bin.
How to arrange appliances on a small kitchen counter?
Place your primary appliance against the wall or backsplash near an outlet, then use the space in front for a tiered riser with jars and containers. Store secondary appliances like grinders or frothers in cabinets and pull them out only when needed.
What are some coffee station ideas for small spaces?
Popular small-space ideas include a two-tier riser behind the coffee maker, a wall-mounted mug rack, a turntable for jars in deep corners, a slide-out cabinet tray that hides the station when not in use, and a rolling cart for mobile entertaining.
How to arrange a coffee station?
Arrange items by frequency of use. Keep your coffee maker, daily mugs, and sweetener at the front within easy reach. Place backup supplies and less-used tools on higher tiers or in storage bins behind or below the main zone.
Wrapping Up Your Small Counter Station
Knowing how to set up a coffee or tea station on a small counter comes down to measuring your space, choosing one compact appliance, building vertical storage with a riser and mug tree, containing loose items in clear jars, and maintaining the setup with a simple daily and monthly routine. You do not need a big kitchen or a big budget to create a station that makes every morning smoother and more enjoyable.
Start with what you already own today. Rearrange your mugs, clear a strip of counter, and test the layout for a week. Once you know what works, add a riser, a set of jars, and a turntable to lock in the organization. Your future morning self will thank you.