
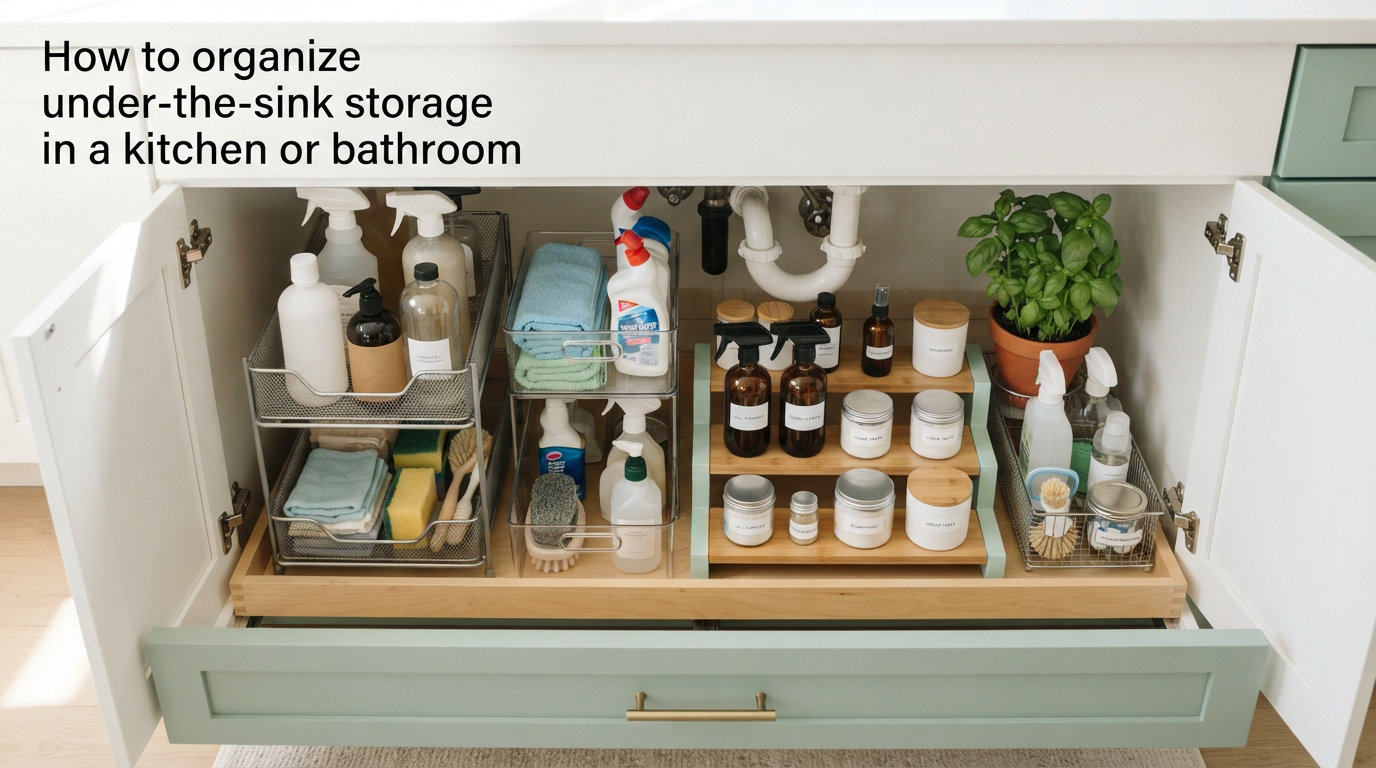
I have opened dozens of under-sink cabinets for clients, friends, and family members over the years, and they almost always share the same problem: a jumble of half-used bottles, leaky pipes, and one mystery sponge. Learning how to organize under-the-sink storage turns that chaotic zone into one of the most useful spots in your kitchen or bathroom.
This guide walks you through the exact process I use, step by step. You will learn how to clear out clutter, protect your cabinet, work around pipes and disposal units, and choose storage tools that actually fit. By the end, your under-sink cabinet will look clean, stay dry, and make everyday supplies easy to grab.
Last updated for 2026, these methods reflect what professional organizers and homeowners on Reddit consistently recommend as the most reliable approach.
Table of Contents
Step 1: Empty and Declutter the Cabinet First
Empty everything out before you reorganize, even if it feels like extra work. I learned this the hard way after trying to organize around existing clutter for an entire afternoon and ending up right back where I started.
Pull out every bottle, bag, and stray item, then sort into three piles. Keep items you actually used in the last 60 days. Relocate anything that belongs in a pantry, closet, or laundry room. Toss expired cleaning products, dried-up sponges, and bottles with mystery liquids inside.
A few quick rules help during this step. Do not keep duplicates of the same cleaner. Check expiration dates on sprays and detergents. Recycle plastic containers you will never refill. This simple pass usually removes about 30 percent of what was in the cabinet.
Tip
Take a quick photo of the empty cabinet before you start adding things back. It helps you remember the space and plan zones based on the actual layout, including the pipes and any odd corners.
Step 2: Deep Clean and Protect the Cabinet
Clean and dry the cabinet thoroughly before adding any storage. Moisture is the number one enemy of under-sink storage, and a quick wipe-down now prevents musty smells and warped shelves later.
Use an all-purpose cleaner or a mix of white vinegar and water to wipe down the floor, walls, and door of the cabinet. Dry every surface with a clean towel. While the cabinet is empty, check for any small leaks around the P-trap, supply lines, or disposal connections.
Once dry, install a shelf liner. A waterproof, non-adhesive liner protects against small spills and makes future cleanups fast. Cut the liner to fit around pipes so the entire base is covered. This single step saves your cabinet from water rings and stain damage over time.
Warning
Never store paper products like paper towels or important documents under a sink. Even a small leak can destroy them in minutes.
Step 3: Add Lighting So You Can Actually See Everything
Most under-sink cabinets are dark, even with the door open. Adding a small light source instantly makes your system easier to maintain, because you can actually see what is in the back.
Stick-on LED puck lights or battery-powered motion sensor bars are the easiest options. They install in seconds with adhesive backing, no wiring needed. Place one toward the front of the cabinet so it lights up as soon as the door opens.
A simple light strip along the back wall also works well and runs on AA batteries for months. I prefer motion-activated lights because they turn on only when needed, which saves battery life and keeps the system feeling effortless.
Smart Storage Solutions That Work Around Pipes
Standard shelves rarely fit under a sink because of the P-trap, shut-off valves, and sometimes a garbage disposal. The right organizers are designed to slide around or step over these obstacles.
Tiered and Pull-Out Shelves
Tiered shelves raise items up so nothing gets lost in the back. Pull-out drawer units let you slide the entire shelf out like a small dresser, which solves the deep-cabinet problem where items disappear behind pipes.
Lazy Susan
A small turntable works best under a bathroom sink where the layout is usually wider and pipes sit in the center. Spin to reach the bottle in the back without crawling on the floor.
Tension Rods
Hang spray bottles by their triggers from a tension rod mounted between the cabinet walls. This frees up floor space and keeps bottles upright and visible. Reddit users frequently call this the cheapest, most effective hack for small under-sink cabinets.
Door Storage
Use the inside of the cabinet door with over-the-door caddies, adhesive hooks, or slim wire racks. This is perfect for trash bags, microfiber cloths, rubber gloves, and other flat, lightweight items.
Stackable and Labeled Bins
Clear stackable bins let you see contents at a glance. Group similar items together, then label the front of each bin so anyone in your household can find what they need and put it back in the right place.
Grab-and-Go Totes
A small open-top tote holds your daily cleaning supplies in one place. Lift the whole tote out when you need to clean a counter or sink, then slide it back when you are done. This saves you from digging through the cabinet each time.
Kitchen vs Bathroom Under-Sink Storage: Key Differences
Kitchen and bathroom under-sink spaces look similar, but they store very different items and face different challenges. A quick comparison helps you pick the right setup for each.
Kitchen cabinets are usually deeper, taller, and often share space with a garbage disposal and dishwasher lines. They handle cleaning supplies, dish soap, trash bags, and overflow pantry items like extra paper towels.
Bathroom cabinets are shallower, sit higher off the floor, and frequently have only one or two pipes. They hold toiletries, hair tools, extra toilet paper, and personal care products that do not tolerate humidity well.
Choose organizers sized to each space. A 12-inch wide pull-out drawer works for a small bathroom but gets lost in a deep kitchen cabinet. A two-tier shelf fits perfectly under a kitchen sink but crowds a narrow bathroom vanity.
What to Store Under Sink (and What to Keep Out)
Choosing the right items keeps your under-sink zone useful instead of risky. Here is a quick guide for both rooms.
What to Store Under Kitchen Sink
- Dish soap, dishwasher pods, and rinse aid
- Trash bags and recycling bags
- All-purpose cleaners and disinfecting sprays
- Sponges, scrub brushes, and microfiber cloths
- Oversized plastic wrap, foil boxes, or bag refills
What to Store Under Bathroom Sink
- Extra shampoo, conditioner, and body wash
- Hair tools that have cooled down
- Toilet paper backup rolls
- Cotton swabs, cotton balls, and small first-aid items
- Cleaning supplies for the toilet and sink
What NOT to Store Under Any Sink
- Electronics, chargers, or anything with a plug
- Important documents, photos, or paper records
- Fabrics that mold easily, like fabric shopping bags or cloth napkins
- Open food, pet food, or bird seed
- Candles or items that melt in heat (under-sink cabinets trap warmth near pipes)
Common Mistakes to Avoid When Organizing Under-Sink Storage
Most under-sink systems fall apart because of a few recurring mistakes. Skip these and your setup will last much longer.
Do not skip the liner. A bare cabinet floor absorbs spills and stains almost immediately. Many homeowners also forget to leave clearance around the P-trap, which causes pipes to bang against bins every time you open the door.
Avoid stacking items without a bin. Loose bottles topple over and bury smaller items in seconds. Do not store anything that is not waterproof, since even a tiny leak ruins cardboard and paper goods.
Finally, do not put cleaning products within reach of small children without a childproof lock. Locking latches cost a few dollars and prevent serious accidents.
Quick Safety Note
If you have kids or pets, store all chemical cleaners in a locked bin or on the highest shelf. The most organized cabinet is useless if it is not safe.
Maintenance Tips to Keep Your System Working
An under-sink system only stays useful if you maintain it. Spend five minutes every three months checking for leaks, replacing the shelf liner if stained, and restocking supplies.
Wipe the cabinet floor during your routine kitchen or bathroom clean. Pull out bins briefly to check for moisture or slow drips. Rotate older products to the front so you use them before expiration.
If something no longer fits or you stop using it, take 30 seconds to remove it right away. A small habit of removing one item each week keeps your system from creeping back toward chaos.
Frequently Asked Questions
What to store under a sink in a kitchen?
Store items you reach for during kitchen cleanup. Dish soap, dishwasher pods, trash bags, all-purpose cleaners, sponges, scrub brushes, and microfiber cloths all work well under a kitchen sink.
What not to store under the kitchen sink?
Avoid electronics, paper documents, fabrics that mold easily, open food or pet food, candles, and any item that is not waterproof. Even a small leak can quickly destroy these items.
What should be stored under a bathroom sink?
Bathroom under-sink storage works best for extra shampoo, conditioner, body wash, hair tools that have cooled down, backup toilet paper rolls, cotton swabs, cotton balls, small first-aid items, and toilet or sink cleaning supplies.
What are some common mistakes to avoid when organizing under sink storage?
The biggest mistakes include skipping the liner, forgetting clearance around the P-trap, stacking loose bottles without bins, storing paper or fabric items, and leaving cleaning supplies within reach of children or pets without a lock.
How do you deal with humidity under a sink?
Start with a waterproof shelf liner, add a small stick-on moisture absorber, and only store sealed plastic containers. Wipe the cabinet floor monthly and check for slow leaks around the P-trap and supply lines.
Final Thoughts: Make Under-Sink Organization Stick
Learning how to organize under-the-sink storage is one of those small projects that pays off every single day. A clean, dry, well-lit cabinet means no more lost sponges, no more mystery leaks, and no more digging for the trash bags when guests are at the door.
Start with the declutter step this weekend, work through one section at a time, and use the storage tools that fit your specific pipes and habits. Within an hour or two, your under-sink space will go from the most chaotic spot in the house to one of the most reliable. Updated for 2026, this guide will keep working for you every season of the year.